
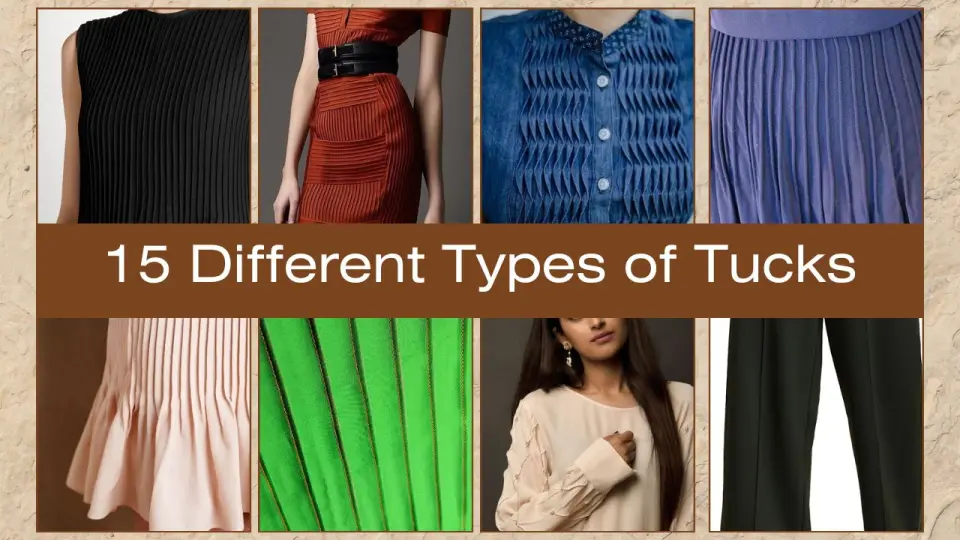
5 Different Types of Tucks in Garments | Discovering the Art of Tucks
What are Tucks in Garments?
Different types of tucks in garments are basically crafted folds in fabric achieved through stitching, serving both decorative and shaping functions in the realm of garment construction. Whether executed as a straight or angled fold, its primary purpose is to introduce visual interest texture or contribute to the overall fullness and form of a piece of clothing. Tucks showcase meticulous artistry in sewing, elevating garments beyond mere functionality to a realm of aesthetic finesse and tailored elegance.
Table of Contents
How Tucks are Different Than Pleats?
Tucks and pleats are both techniques involving fabric folds, yet they differ in their execution. Tucks are created by stitching along the fold line, securing the fabric in place. On the other hand, pleats are formed as unstitched folds, with the stitching applied at the top of the folds along a perpendicular line. This distinction in stitching placement lends unique characteristics to each method, showcasing the diverse approaches to manipulating fabric to achieve specific design outcomes.
Types of Tucks
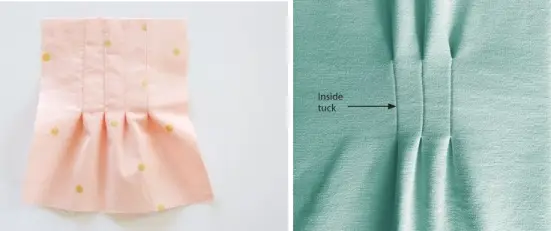
Blind Tucks
Blind tucks are a variant of plain tucks. Blind tucks are concealed parallel folds raised from the fabric surface, secured by stitching spanning the entire length of the fabric. These tucks intricately overlap, concealing both the stitching and the spaces between them, creating a seamless and elegant appearance.
How to Sew Blind Tucks?
Pin Tucks
Pin tucks, another variant of plain tucks, are narrow and almost as wide as a pin. These delicate tucks are best suited for thin fabrics.

How to Sew Pin Tucks?
Cross Tucks
Bidirectional in nature, cross tucks are crafted both in length and width. These tucks, resembling shells, are initially formed in length and pressed before being stitched in width. With scalloped corners, they offer a distinctive decorative effect. Cross tucks can be applied as single corners or multiple lines, suitable for thin to medium-weight fabrics.
How to Stitch Cross Tucks?
Corded Tucks
Also known as piped tucks, corded tucks involve using a drawstring on the wrong side of the fabric before stitching the tuck at the centre. A zipper foot is employed for stitching corded tucks.
How to Sew Corded Tucks?
Dart Tucks
Dart tucks deviate from the conventional dart style, resembling double-pointed darts in their draft. However, only one-half of this dart is stitched, leaving the other half unsewn. This unique approach imparts a pleated appearance, introducing both texture and fullness to the garments.
Dart tucks play a role in providing fitting and shape to garments. Positioned on the shoulder line, the front part of the bodice, the front and back parts of the waistline, and on the right and wrong sides of the back part of the garment, dart tucks introduce fullness. They are generally crafted on the wrong side of the fabric, although, in some cases, they are made on the right side for decorative purposes.
Dart tucks differ from regular darts in several ways:
- Dart tucks are narrower (approximately 0.5 cm) than regular darts.
- They are stitched in groups of 3 or 4 to achieve the desired shape.
- Dart tucks maintain an equal width throughout, whereas regular darts taper down, creating a pointed end.
How to Sew Dart Tuck?
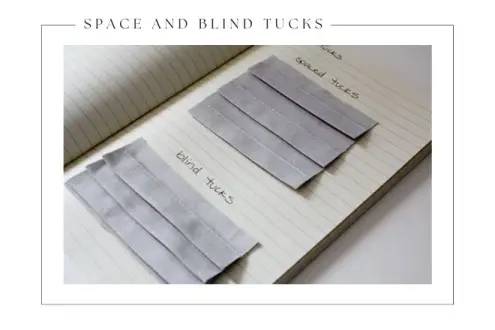
Space Tucks
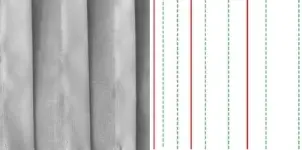
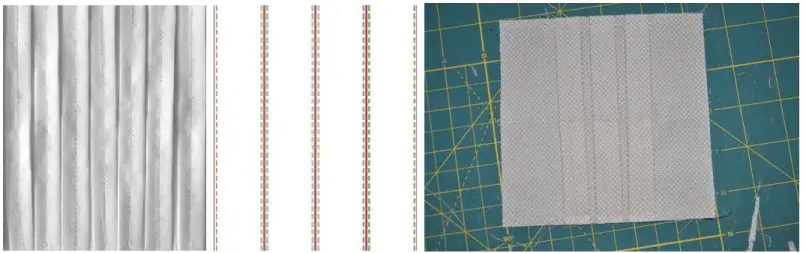
In the sewing world, “space tucks” are a fancy way to make your fabric look great. You fold the fabric in parallel lines and stitch them at even spaces, keeping the identical width of the tucks, however, visibly spaced from one another. Space tucks are bigger than pin tucks, so they’re easier to fold and stitch. They stand out on the fabric, giving it a 3D look.
To make spaced tucks, you fold and iron the fabric along the lines you want and then stitch carefully. Measuring accurately and folding the right way is crucial to keep the fabric looking good. These tucks work well on light fabrics, but you might need to make deeper tucks if your fabric is heavy.
How to Sew Spaced Tucks?
Shell Tucks
Shell tucks, a captivating sewing method, elevate the aesthetic appeal of fabric through a decorative effect. The process involves meticulously folding the fabric and securing it with stitching, resulting in straight-line tucks. The name “shell tuck” is derived from modifying a pin tuck, creating a slightly rounded edge that resembles a shell.
Shell tucks, which are primarily employed on blouse fronts, produce varied patterns depending on the chosen fabric. While they fall under the category of pin tucks, they distinguish themselves with wider fabric lengths between stitching lines. These broader fabric flaps are cross-stitched, introducing a delightful twisted or wavy appearance to the fabric. Beyond blouses, shell tucks find application in dresses and various garments, imparting a decorative flair to necklines and hems.
Transforming your sewing projects with shell tucks is a relatively straightforward process, offering versatility in application. They are ideal for delicate, sheer fabrics but also prove effective on knit fabrics. Crafting a shell tuck involves folding and sewing the fabric, followed by ironing to achieve a crisp edge. This sequence is repeated at regular intervals, creating an enchanting pattern of shell tucks that enhances the visual allure of the fabric.
How Do You Sew Shell Tucks Using a Hand Stitch?
How Do You Sew Shell Tucks in the Sewing Machine?
Release Tucks
Release tucks are a practical solution for concealing excess fabric and fullness in clothing. Their distinguishing feature lies in their partial stitching, where only a specific section is sewn, leaving the other part of the fabric. This intentional design choice adds a stylish dimension to the garment, allowing for a controlled and tailored appearance. The release tuck technique provides a subtle yet effective way to manage fabric volume, contributing to the overall aesthetics of the clothing piece.
How to Stitch Release Tucks?
Twisted Tucks or Wave Tucks or Mexican Tucks
Twisted Tucks, also known as Wave Tucks or Mexican Tucks, represent a creative approach to fabric embellishment, introducing a captivating wave design. The process involves a two-stage stitching technique, beginning with the creation of simple tucks. Subsequently, a cross-stitching method is employed to fashion up-and-down waves, bringing the distinctive wave-like pattern to life on the fabric.
How to Stitch Wave Tucks?
Bubble Tucks
Bubble tucks, also known as cross-tacked tucks, are centred tucks in a garment that split open between stitches, creating a bubbly or puffy effect by squeezing the folds together. This technique involves gently steaming the tucks from the wrong side to create the desired bubbly effect. Bubble tucks are used to add a decorative and textural element to clothing, and they are often found in the chest area of blouses or shirts, enhancing the design and aesthetic appeal of the garment.
How to Hand Sew Bubble Tucks?
Lattice Tucks
Lattice tucks are a type of decorative tuck used in sewing to create a lattice-like effect on the fabric. They are made by sewing one tuck in one direction and then sewing a cross tuck in the other, repeating the process back and forth. The difference between lattice tucks and cross tucks is that the tucks (vertical and horizontal) are pressed in opposite directions, creating a unique lattice pattern on the fabric. Lattice tucks are used to add texture and visual interest to garments, enhancing their design and aesthetic appeal.
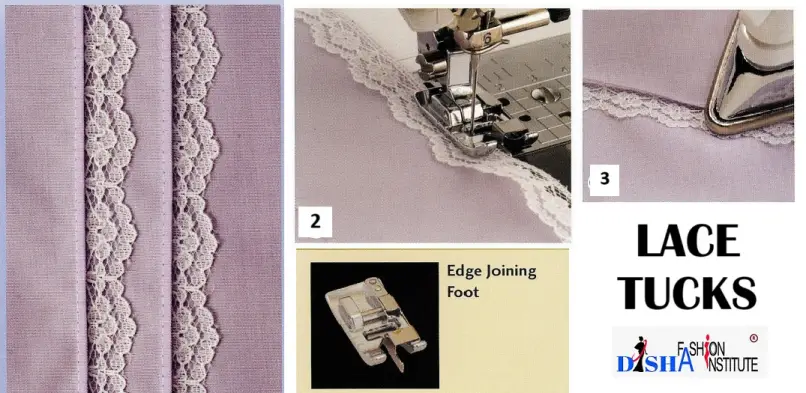
Lace Added Tucks
Lace-added tucks refer to a technique where lace is sewn to the edge of tucks in a garment, creating a decorative and intricate design. This process involves sewing the lace and the tucks simultaneously, enhancing the visual appeal of the fabric. The combination of tucks and lace adds texture and elegance to the garment, making it a popular choice for creating unique and stylish clothing.
Procedure for Sewing Lace to Tucks
It is always beneficial to use an Edge Joining Foot to sew lace-added tucks.
Materials:
- Edge Joining Foot
- Fabrics of your choice
- Edging lace
- Universal needle, size 80/12
- All-purpose sewing thread for needle and bobbin
Steps:
Measure and Mark:
- Measure and mark the placement for each tuck on your fabric.
- Press the fabric with the wrong sides together.
Layer and Sew:
- Layer the straight edge of the lace on the fold of the fabric.
- Place both against the blade of the edge joining foot.
- Adjust the needle position to make a tuck and sew the lace simultaneously. This creates a tuck with lace sewn along its edge.
Open and Press:
- Open the tuck and press it, along with the lace, to one side.
- Repeat steps 2 and 3 for as many tucks as desired.
Tip: When measuring and sewing lace tucks, remember to allow space for the lace width between tucks before stitching another tuck.
Graduated Tucks
Making graduated tucks involves folding and sewing fabric to create a series of narrow, parallel pleats that grow wider or narrower along the length of the fabric. This technique adds texture and visual interest to garments and home decor items. Here’s a detailed process for making graduated tucks:
Materials:
- Fabric
- Sewing machine
- Thread
- Iron
- Fabric marking tool (optional)
Process:
Prepare the Fabric: Begin by selecting the fabric for your project. Choosing a lightweight fabric, such as cotton, linen, or silk, is important to hold the tucks well. Pre-wash and iron the fabric to remove any wrinkles and shrinkage.
Calculate Tuck Spacing: Determine the desired spacing between each tuck and the width of the tucks at the beginning and end of the fabric. For example, you might want the tucks to start at 1/4 inch wide and gradually widen to 1 inch throughout 12 inches.
Marking the Fabric (Optional): If you want precise tuck placement, use a fabric marking tool and ruler to draw parallel lines along the fabric’s length to indicate the tucks’ fold lines. Alternatively, you can use pins to mark the fold lines as you sew.
Create the First Tuck: Fold the fabric along the marked line for the first tuck. Press the fold with an iron to create a crisp edge. The fold should be pressed to the wrong side of the fabric.
Sew the First Tuck: Secure the folded tuck with pins or clips, then stitch along the edge of the fold using a straight stitch on your sewing machine. Backstitch at the beginning and end of the tuck to secure the stitching.
Gradually Widen the Tucks: After sewing the first tuck, measure the desired distance from the first and mark the position for the next tuck. Fold the fabric at this mark, press with an iron, and sew along the edge of the fold to create the second tuck. Continue this process, gradually increasing the tuck width at regular intervals to achieve the graduated effect.
Press the Tucks: Once all the tucks are sewn, press the fabric with an iron to set the tucks and create a smooth, even appearance.
Tips:
- Practice on scrap fabric to determine the spacing and width of tucks that will achieve the desired graduated effect for your project.
- Take your time and ensure each tuck is folded and sewn accurately to maintain a professional finish.
- Experiment with different tuck widths and spacing to create unique and varied effects.
With these steps, you can create beautiful graduated tucks to add intricate detail to your sewing projects.
Centered Tucks
Creating centred tucks involves a precise method of folding and sewing fabric to achieve evenly spaced, symmetrical tucks. Here’s the detailed process for making centred tucks:
Prepare Your Fabric: Start by washing, drying, and pressing your fabric to remove creases or wrinkles. This will ensure that your tucks are neat and even.
Mark the Tuck Placement: Use fabric chalk or a disappearing fabric marker to mark the placement of your tucks on the wrong side of the fabric. If making multiple tucks, measure and mark their positions carefully to ensure they are evenly spaced and aligned.
Fold and Press: Fold the fabric along the first marked line, bringing the wrong sides of the fabric together. Use an iron to press the fold firmly and create a sharp crease.
Create Guidelines: For precision, you can use a ruler and additional fabric marking tools to create guidelines for your tucks. These guidelines will help you ensure the tucks are straight and evenly spaced.
Stitch the Tuck: With the first tuck folded and pressed, stitch along the edge of the fabric nearest to the fold. This stitching secures the tuck in place and creates a neat, defined tuck line.
Repeat: Fold and press the fabric along the marked lines, then stitch to secure each tuck. Take care to fold and press each tuck accurately, following the guidelines you created for consistent spacing.
Press Again: Once all the tucks are stitched, press the fabric again to set them and ensure they lay flat and neat.
Finish the Sewing Project: Depending on your project, you may now incorporate the fabric with tucks into your design, whether it’s for clothing, home decor, or other creative projects.
Remember, precision, patience, and attention to detail are crucial when creating centred tucks. With practice, you’ll master this technique and use it to add beautiful, textured detail to your sewing projects.
How to Sew Centered and Double-Centered Tucks?
Doubled Centered Tucks
Double-centred tucks are a sewing technique that creates neat, evenly-spaced tucks in fabric. The process involves folding and sewing the fabric in a specific way to create the desired effect. Here’s a detailed process for making Doubled-Centered tucks:
Gather Materials:
- Fabric of your choice
- Sewing machine or needle and thread
- Iron and ironing board
- Ruler or measuring tape
- Fabric marker or chalk
Prepare the Fabric:
- Start by washing and ironing the fabric to remove any wrinkles and pre-shrink the material.
Marking the Tucks:
- Lay the fabric flat on a smooth surface and determine the placement and width of the tucks. Using a ruler and fabric marker or chalk, mark the lines where you want the tucks to be.
Creating the Tucks:
- Fold the fabric along the marked lines, bringing the edges together to create the tuck. Press the fold with an iron to create a sharp crease.
Sewing the First Set of Tucks:
- Secure the fabric with pins along the folded tuck to keep it in place.
- Set your sewing machine to a straight stitch, or prepare your needle and thread.
- Sew along the folded edge of the tuck to secure it in place. Ensure the stitch is straight and even.
Creating the Second Set of Tucks:
- Once the first set of tucks is sewn, fold the fabric again along the same lines, enclosing the first tucks within the new folds. Press the folds with an iron to create sharp creases.
Sewing the Second Set of Tucks:
- Secure the fabric with pins along the new folded tuck to keep it in place.
- Set your sewing machine to a straight stitch, or prepare your needle and thread.
- Sew along the folded edge of the second tuck, ensuring it is evenly spaced and parallel to the first set of tucks.
Finish:
- Trim any loose threads and give the tucks a final press with the iron to set the stitches and create a neat, polished look.
Remember, practice makes perfect, so achieving the desired result may take a few tries. Additionally, it’s always a good idea to test the technique on a scrap of fabric before working on your project.
Tools Required for Tucks
To master the art of tucks, a few essential tools come in handy:
- Sewing Gauge: Facilitates stitching lines without marking. It helps quickly measure the width of the tucks.
- Tucker Attachment: The Singer Tucker attachment, featuring adjustable guides, simplifies the creation of tucks with consistent width and spacing. This type of tool is available for purchase from Singer and other sewing machine providers. This tool allows for easy customization of tucks to match pattern styling or showcase unique individuality. Tucks can be crafted by first tucking the fabric and then cutting it from a plain pattern, offering versatility in design expression.
Conclusion
In conclusion, tucks are not merely stitches; they are the artistic touch that elevates garments. Each type of tuck carries its unique charm, from plain tucks’ simplicity to dart tucks’ intricate elegance. As you delve into the world of tucks, armed with the right tools and techniques, remember that mastering this craft opens the door to endless possibilities in garment decoration and tailoring. Happy sewing!
Explore More: Ready to broaden your sewing expertise? Dive into our next topic: Types of Darts and Types of Plackets. Click the button below to continue your sewing journey.