
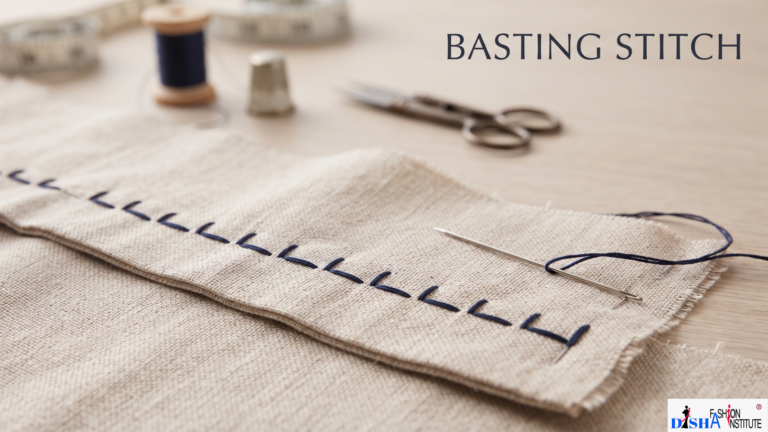
A Basting Stitch is a temporary stitch made with relatively long, loose stitches to hold two or more layers of fabric in their intended position before permanent sewing.
It can be sewn by hand or with a sewing machine. Hand basting generally uses a simple running stitch, while machine basting is usually created by selecting a longer straight-stitch length.
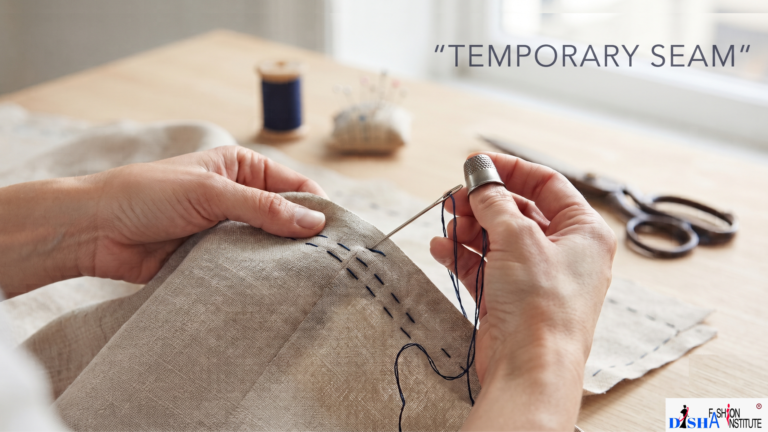
The main purpose is not to create a strong finished seam. Instead, it acts as a temporary guide or holder, allowing you to check the position and make corrections before committing to the final stitching.
Basting is also commonly called tacking in sewing terminology.
Why Is Basting Temporary?
The stitches are deliberately made longer and easier to remove than ordinary construction stitches. Once the permanent seam has been sewn and checked, the temporary stitches can normally be removed carefully with a seam ripper or small scissors.
Using a contrasting thread can make the temporary stitches easier to see and remove.
Why Is Basting Stitch Used?
Basting may seem like an extra step, but it can prevent mistakes that take much longer to correct later.
Here are some of its most useful applications:
- Checking Garment Fitting
Before permanently stitching a garment, basting allows you to check whether a seam, sleeve, neckline, or other section sits correctly. If an adjustment is needed, the temporary stitches can be removed without having to unpick a finished seam.
- Holding Fabric Layers Together
Multiple layers can shift while sewing, particularly around curves or difficult construction areas. Basting temporarily keeps the layers aligned.
- Installing Zippers
A zipper can move or become misaligned while being permanently stitched. Basting it first gives you an opportunity to check its position before sewing close to the zipper teeth.
- Setting Sleeves
Curved sleeve caps can be challenging to position accurately. Temporary stitching can help hold the sleeve in the armhole while you distribute the fabric and check the fit.
- Matching Patterns
When working with stripes, checks, prints, or other patterns that need careful alignment, basting provides extra control before the final seam is sewn.
- Creating Gathers
Long temporary stitches can also be used to gather fabric. The fabric can be drawn along the thread to create controlled fullness for skirts, sleeves, ruffles, and similar details.
Types of Basting Stitch
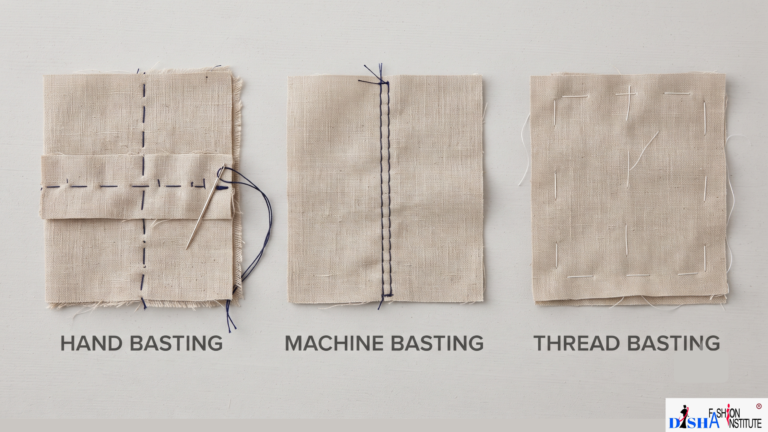
Basting can be done in different ways depending on the fabric, garment, and purpose. The three commonly used methods are hand basting, machine basting, and thread basting.
Hand Basting
Hand basting is made using a needle and thread, generally with long, loose running stitches. It provides excellent control and is useful for curved seams, fitting adjustments, delicate fabrics, and areas that require precise positioning.
Machine Basting
Machine basting is performed using a sewing machine with a longer-than-normal straight stitch. It is faster than hand basting and can be useful for long seams or larger projects.
The temporary stitches should remain easy to remove, so the stitching is generally not secured as firmly as a permanent seam.
Thread Basting
Thread basting is a temporary method of holding fabric pieces or garment components in their correct position using thread. It is particularly useful when accurate placement is important before permanent stitching.
Unlike pins, thread basting keeps the fabric layers connected along the required area and reduces the chance of pieces shifting while they are handled or sewn.
It can be useful for positioning collars, sleeves, pockets, zippers, trims, and other garment components where precise alignment is needed.
How to Make a Basting Stitch by Hand
Making a basic hand basting stitch is simple.
Step 1: Prepare the Fabric
Place the fabric pieces together and align the edges, markings, or seam lines that need to match.
Step 2: Thread the Needle
Choose a suitable sewing thread. A contrasting colour can make the temporary stitches easier to identify later.
Step 3: Start the Stitching
Insert the needle through the fabric and bring it back up, creating a simple running stitch.
Step 4: Keep the Stitches Long and Loose
Continue along the required line using relatively long stitches. Hand basting is commonly made with stitches around 6–12 mm long, although the appropriate size can vary according to the fabric and purpose.
Step 5: Leave the Thread Easy to Remove
Avoid making the temporary stitching unnecessarily tight. The purpose is to hold the fabric securely enough for construction while still allowing easy removal.
Step 6: Check the Result
Before permanent sewing, check the alignment, placement, or garment fit. Make any necessary corrections.
Step 7: Sew Permanently
Once everything is correctly positioned, sew the final seam using the appropriate permanent stitch.
Basting Stitch vs Permanent Stitch
Although both involve sewing thread through fabric, their purposes are very different.
Feature | Basting Stitch | Permanent Stitch |
Main purpose | Temporary holding or positioning | Final garment construction |
Stitch appearance | Usually longer and looser | Usually shorter and more secure |
Removal | Designed to be removed | Normally remains in the garment |
Main benefit | Allows adjustment before final sewing | Creates the finished seam |
Common use | Fitting, alignment, zippers, gathers | Seams, hems and garment construction |
The key difference is intention. Basting is a temporary construction aid, while permanent stitching is part of the finished garment.
When Should You Use a Basting Stitch?
Basting is particularly useful whenever accuracy is more important than saving a few minutes during the preparation stage.
Consider using it when:
- You need to check the fit of a garment before final sewing.
- Two fabric layers tend to move during stitching.
- You are attaching a zipper and want to check its placement.
- A sleeve needs careful positioning inside an armhole.
- Stripes, checks, or prints need to line up.
- You are working with slippery or delicate materials.
- You need to temporarily position pockets, trims, collars, or other components.
- You want to create gathers before permanently attaching the fabric.
It is also useful in quilting and other textile projects where several layers need to stay together temporarily.
Tips for Using Basting Stitch
A few simple practices can make basting more effective:
Use a visible thread: A contrasting colour makes temporary stitches easier to identify and remove.
Do not pull too tightly: Excessive tension can distort the fabric or change the shape you are trying to create.
Check alignment before permanent stitching: Basting gives you a chance to correct mistakes, so use that opportunity.
Choose stitch length according to the fabric: Delicate or curved areas may require closer temporary stitches for better control, while larger areas can use longer stitches.
Remove temporary stitches carefully: Once the permanent seam is secure, remove the basting without damaging the fabric.
Final Thoughts
A Basting Stitch may be temporary, but it plays an important role in accurate sewing and garment construction. It helps hold fabric in place, check fitting, align patterns, position zippers and sleeves, and create gathers before permanent stitching.
For beginners, learning this simple technique can make sewing projects easier to control. For experienced dressmakers, it remains a practical way to improve precision and reduce avoidable mistakes.
The next time you are unsure about a seam or fabric placement, taking a few moments to use a Basting Stitch can save considerably more time later.
Join Disha Fashion Institute
You can also visit our Homepage or explore our different Course pages to learn more about our programs. If you need any guidance related to courses like Basic Tailoring, Diploma in Tailoring, Fashion Designing, or other fashion-related courses, feel free to contact us. Our team will understand your requirements, skill level, and career goals to guide you toward the most suitable course that matches your learning needs. you can check our YouTube Channel we post our Institute and tutorial over there.