
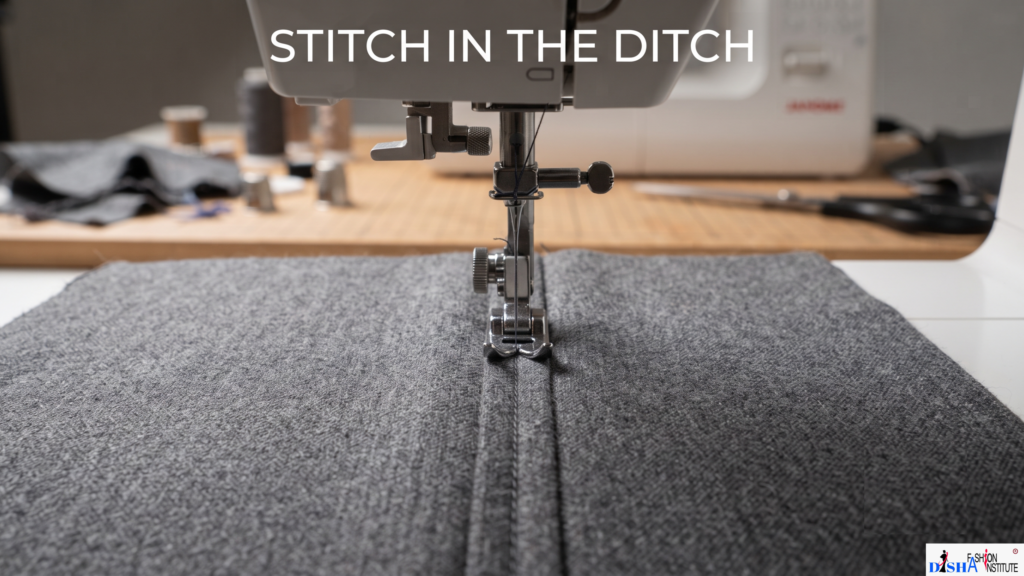
In sewing, the “ditch” is the narrow groove created where two pieces of fabric meet at an existing seam. To stitch in the ditch, you place the sewing machine needle directly into this groove and sew along the established seam line.
The technique is usually performed from the right side of the garment. When matching thread is used and the stitching is accurately positioned, the additional stitches can blend into the existing seam.
Why Is Stitch in the Ditch Used?
Stitch in the ditch is mainly used to keep fabric layers securely positioned while maintaining a neat appearance.
Common reasons for using this technique include:
- Securing a neckline or armhole facing
- Holding waistbands in position
- Securing collars and cuffs
- Attaching or securing bias binding
- Keeping garment layers flat
- Securing quilt layers along existing seams
- Creating a clean finish without adding a prominent topstitched line
It is particularly useful when you want the stitching to blend with an existing seam rather than become a decorative feature.
How Does Stitch in the Ditch Work?
The process is simple because the existing seam acts as a guide.
First, the fabric layers are pressed and positioned correctly. The layer that needs to be secured is placed underneath or behind the main fabric. The garment is then turned to the right side.
The needle is positioned directly over the existing seam. As you sew, the needle follows the seam groove, securing the underlying layer while keeping the visible stitching as discreet as possible.
Sewing slowly is important because even a small deviation from the seam can make the stitching more visible.
Where Is Stitch in the Ditch Used?
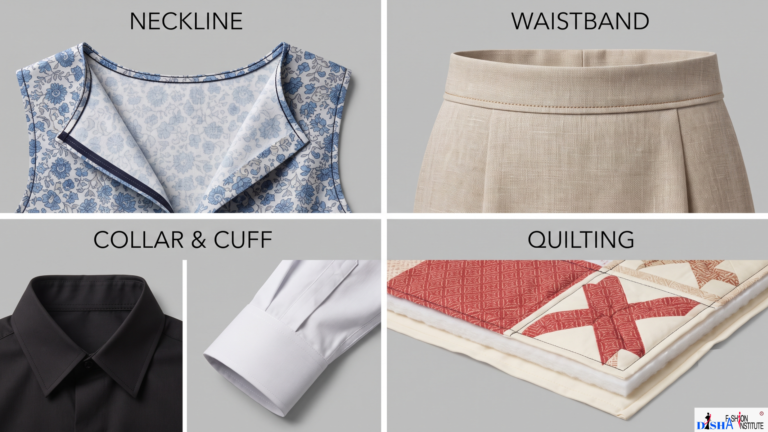
Stitch in the ditch can be used in many areas of garment construction and sewing projects.
1. Neckline Facings
A neckline facing can be secured by stitching along the existing neckline seam. This helps prevent the facing from rolling toward the outside of the garment.
2. Waistbands
It can be used to secure the inside edge of a waistband while keeping the stitching aligned with the waistband seam.
3. Collars and Cuffs
Collars and cuffs often have multiple fabric layers. Stitching in the existing seam can help secure these layers neatly.
4. Bias Binding
When binding is attached around an edge, stitching in the seam can provide a clean way to secure the binding.
5. Quilting
The same technique can also be used along existing quilt seams to secure layers while keeping additional stitching subtle.
How to Stitch in the Ditch
Follow these simple steps to create a neat stitch in the ditch:
Step 1: Press the seam
Press the seam properly so the fabric layers lie flat.
Step 2: Position the fabric
Make sure the layer you want to secure is correctly positioned underneath the main fabric.
Step 3: Match the thread
Choose a thread colour that closely matches the fabric for a less noticeable finish.
Step 4: Position the needle
Place the needle directly in the existing seam line.
Step 5: Start sewing slowly
Guide the fabric carefully and follow the seam as accurately as possible.
Step 6: Check the underside
Make sure the stitching is catching the layer you intended to secure.
Step 7: Secure the stitching
Finish the seam neatly and press the area again if necessary.
Which Presser Foot Should You Use?
A standard sewing machine presser foot can be used for many stitch-in-the-ditch projects. However, a dedicated stitch-in-the-ditch foot can make it easier to keep the needle aligned with the seam.
For thicker projects, such as quilting with multiple layers, a walking foot may provide better fabric control.
The best choice depends on the sewing machine, fabric thickness, and type of project.
Tips for a Neat Stitch in the Ditch
Keep these tips in mind when learning the technique:
- Press the seam before stitching.
- Use a matching thread colour.
- Sew slowly, especially around curves.
- Keep the needle accurately positioned in the seam.
- Do not pull or stretch the fabric while sewing.
- Check the underside regularly.
- Practice on a scrap fabric before sewing the actual garment.
- Use the appropriate presser foot for thick or layered fabrics.
Good seam preparation is often the key to getting a professional-looking result.
Stitch in the Ditch vs Topstitching
Although both techniques involve stitching near a seam, they have different purposes.
|
Stitch in the Ditch |
Topstitching |
|
Follows an existing seam |
Usually creates a separate visible stitch line |
|
Designed to be less noticeable |
Often intended to be visible |
|
Commonly used for securing layers |
Often used for decoration and reinforcement |
|
Usually sewn directly into the seam groove |
Can be positioned at a chosen distance from the edge |
Understanding this difference helps you choose the right technique for your garment.
Common Mistakes to Avoid
One common mistake is sewing beside the existing seam instead of directly into it. This can create an unwanted visible stitch line.
Another mistake is failing to check the underside. If the needle does not catch the layer underneath, the facing, binding, or other fabric piece may not stay securely attached.
Working too quickly can also cause uneven stitching. Take your time and let the existing seam guide the needle.
Final Thoughts
Stitch in the ditch is a simple but highly useful sewing technique for creating clean and professional garment finishes. By sewing directly along an existing seam, you can secure facings, waistbands, collars, cuffs, bindings, and other fabric layers while keeping the additional stitching subtle.
Once you understand how to find the “ditch” and guide your sewing machine accurately, this technique becomes an easy skill to add to your garment-construction toolkit.
Join Disha Fashion Institute
You can also visit our Homepage or explore our different Course pages to learn more about our programs. If you need any guidance related to courses like Basic Tailoring, Diploma in Tailoring, Fashion Designing, or other fashion-related courses, feel free to contact us. Our team will understand your requirements, skill level, and career goals to guide you toward the most suitable course that matches your learning needs. you can check our YouTube Channel we post our Institute and tutorial over there.