
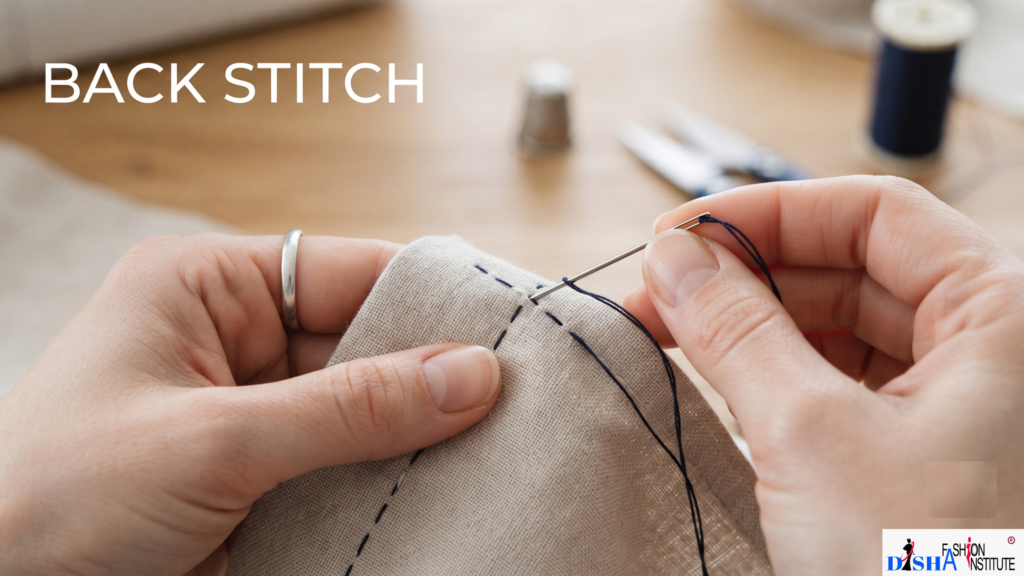
Back stitch is a hand-sewing stitch made by moving the needle forward along the stitching line and then taking it backward into the end of the previous stitch.
Unlike a running stitch, where small spaces normally appear between individual stitches, back stitch creates an almost continuous line. This overlapping construction gives it good strength and makes it suitable for areas that need a secure finish.
It can be sewn on many different types of fabric, although the needle, thread, and stitch length should be chosen according to the material.
Why Is Back Stitch Used?
The main reason for using back stitch is its strength and durability. It is particularly useful when you need a secure hand-sewn line.
Some common uses include:
- Joining fabric pieces by hand
- Repairing opened or damaged seams
- Reinforcing areas that need extra strength
- Hand-sewing small garment sections
- Creating outlines in embroidery
- Securing appliqué pieces
- Completing sewing projects without a sewing machine
Because the stitches form a continuous line, back stitch can be a practical alternative when a strong hand-sewn seam is needed.
How Does Back Stitch Work?
The basic movement of back stitch is easy to understand:
Stitch forward → stitch backward → move forward → stitch backward
First, the needle comes up through the fabric. You then take a stitch forward along your intended stitching line. For the next stitch, the needle goes back into the end of the previous stitch.
The process is repeated along the entire line. The backward movement overlaps the previous stitch, creating a strong and connected row of stitching.
With practice, you can maintain an even stitch length and create a clean, professional-looking line.
How to Sew a Back Stitch by Hand
Follow these simple steps to make a neat back stitch by hand.
Step 1: Prepare the Needle and Thread
Choose a needle and thread that are suitable for your fabric. Avoid using excessively thick thread on delicate fabrics.
Step 2: Bring the Needle Up
Bring the needle from the wrong side of the fabric to the starting point of your stitching line.
Step 3: Make the First Stitch
Take the needle forward through the fabric to create your first stitch.
Step 4: Stitch Backward
Bring the needle back through the fabric at the end of the previous stitch. This backward movement creates the characteristic back stitch.
Step 5: Move Forward Again
Bring the needle up a short distance ahead of the previous stitch.
Step 6: Repeat
Take the needle backward into the end of the previous stitch and continue this forward-and-backward movement until you reach the end.
Step 7: Secure the Thread
Once you finish stitching, secure the thread properly on the wrong side of the fabric.
For a neat result, try to keep the stitches similar in length and follow a straight or marked stitching line.
Where Is Back Stitch Used?
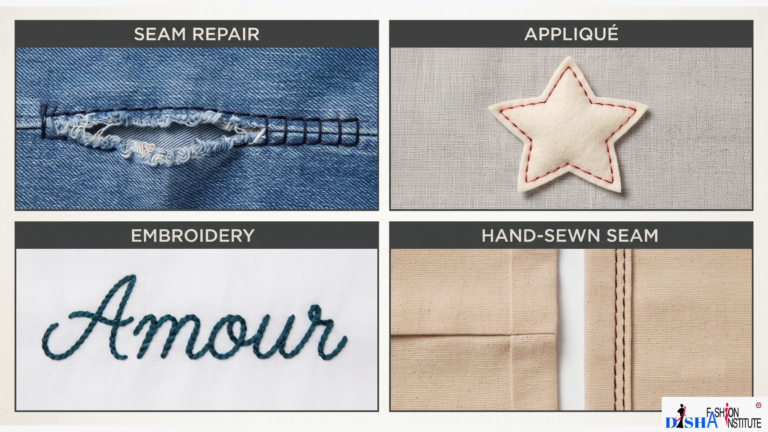
Back stitch is useful in both garment construction and decorative sewing.
Garment Seams
It can be used to create strong hand-sewn seams, particularly when a sewing machine is not available or when a controlled hand stitch is preferred.
Clothing Repairs
Back stitch is useful for repairing small openings or damaged seams. Its continuous structure helps create a secure repair.
Appliqué
When attaching an appliqué, back stitch can be used to outline or secure fabric shapes.
Embroidery
Back stitch is a popular embroidery technique for creating outlines, borders, lettering, and fine linear details.
Small Sewing Projects
It can also be useful for handmade projects where precise hand stitching is required.
Back Stitch vs Running Stitch
Back stitch and running stitch are both basic hand-sewing techniques, but their construction and strength are different.
Back Stitch | Running Stitch |
Creates a nearly continuous line | Usually has visible spaces between stitches |
Stronger and more secure | Generally lighter and less secure |
Useful for seams and repairs | Commonly used for temporary stitching and simple sewing |
Requires a backward movement | Uses simple forward movements |
Takes more time to sew | Usually quicker to sew |
Choosing between them depends on the purpose of the stitching and the type of fabric or project.
Tips for a Neat Back Stitch
Keep these simple tips in mind when learning back stitch sewing:
- Keep your stitch lengths as even as possible.
- Mark the stitching line if you are a beginner.
- Avoid pulling the thread too tightly.
- Do not make the stitches unnecessarily long.
- Use smaller stitches around curves.
- Choose a needle appropriate for the fabric.
- Keep the fabric flat while stitching.
- Practice on a scrap piece of fabric before working on a garment.
Consistent stitch length is one of the easiest ways to make your hand stitching look cleaner and more professional.
Common Back Stitch Mistakes
Beginners often make a few simple mistakes when learning this stitch.
Uneven stitches: Different stitch lengths can make the finished line look untidy.
Large gaps: Leaving spaces between stitches reduces the continuous appearance of the technique.
Pulling the thread too tightly: Excessive tension can cause the fabric to pucker.
Stitching too quickly: Rushing can make it difficult to maintain a straight line and consistent stitch length.
Using the wrong needle or thread: An unsuitable combination can make stitching difficult or damage delicate fabric.
Taking your time and practising on scrap fabric can help you improve quickly.
Final Thoughts
Back stitch is a simple but highly useful hand-sewing technique that every beginner can learn. Its strong, continuous construction makes it suitable for seams, repairs, appliqué, embroidery, and many other sewing projects.
Join Disha Fashion Institute
You can also visit our Homepage or explore our different Course pages to learn more about our programs. If you need any guidance related to courses like Basic Tailoring, Diploma in Tailoring, Fashion Designing, or other fashion-related courses, feel free to contact us. Our team will understand your requirements, skill level, and career goals to guide you toward the most suitable course that matches your learning needs. you can check our YouTube Channel we post our Institute and tutorial over there.