
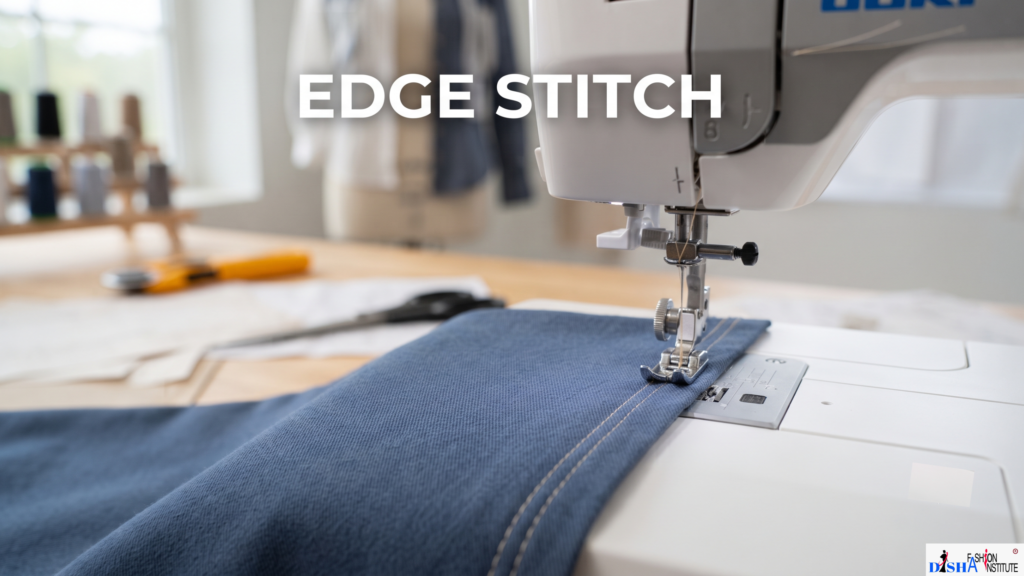
An edge stitch is a line of sewing placed close to the edge of a fabric piece, seam, or garment component. Depending on the construction, it can be used to secure an edge, hold a seam allowance flat, reinforce an area, or add a subtle decorative finish.
The exact distance from the edge can vary according to the garment design and fabric. What matters most is consistency. A line that moves noticeably closer to or farther from the edge can make an otherwise well-made garment look uneven.
Edge stitching is commonly seen on areas such as collars, cuffs, pockets, plackets, waistbands, and garment seams.
Edge Stitch vs Topstitch
Edge stitching and topstitching are closely related, but they are not always identical.
An edge stitch is specifically positioned close to an edge, while topstitching is a broader term for visible stitching placed on the outside of a garment. A topstitch may be positioned farther away from an edge for decorative or structural purposes.
Therefore, an edge stitch can function as a type of topstitching when it is visible on the garment’s outer surface.
Why Is Edge Stitch Used?
An edge stitch can serve several practical and decorative purposes.
- Securing Fabric Edges
It can help keep a folded or constructed edge in its intended position, particularly around garment details that are handled frequently.
- Keeping Seam Allowances Flat
After a seam has been pressed, stitching close to the edge can help hold a seam allowance neatly in place.
- Creating a Clean Finish
A straight, consistent line of stitching gives many garment edges a more polished and professionally constructed appearance.
- Adding Decorative Detail
When contrasting thread is used, the stitching becomes a visible design element. Matching thread can create a more subtle finish.
- Supporting Certain Garment Areas
In suitable constructions, edge stitching can provide additional stability around areas such as pockets, plackets, collars, and cuffs.
Types and Related Edge-Seam Techniques
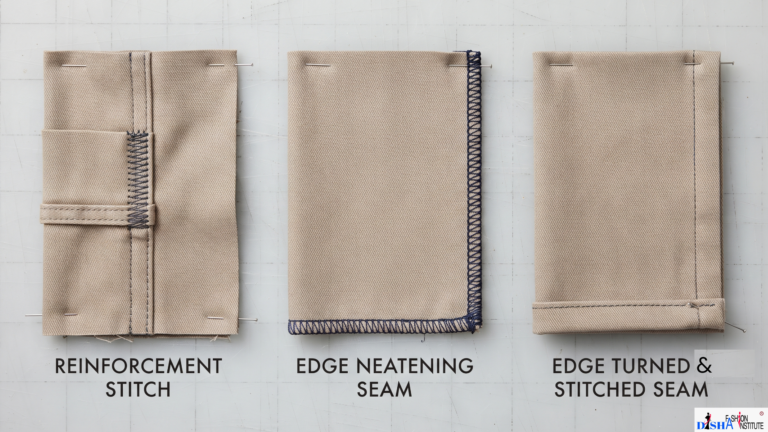
Edge stitching can be used alongside several other sewing techniques. Understanding the difference between them helps when choosing the right finishing method.
Reinforcement Stitch
A reinforcement stitch is primarily used to strengthen an area that is likely to experience additional stress or repeated movement.
For example, reinforcement may be useful at pocket corners, the ends of seams, openings, or other points where fabric could be pulled or strained.
The purpose is different from simply creating a neat edge. A reinforcement stitch focuses mainly on strength and durability.
Depending on the garment, reinforcement can be created using repeated stitching, closely spaced stitches, or a suitable reinforcement method designed for the particular stress point.
Edge Neatening Seam
An edge neatening seam is used to finish a raw fabric edge and help control fraying.
When fabric is cut, its woven or knitted structure can leave the edge vulnerable to fraying or unraveling. An edge-finishing technique can help contain those loose fibres and give the inside of a garment a cleaner appearance.
Depending on the fabric and garment, methods such as zigzag stitching, overlocking, overcasting, or other suitable edge-finishing techniques may be used.
The key purpose here is neatening and controlling the raw edge, rather than simply creating a visible decorative line.
Edge Turned and Stitched Seam
An edge turned and stitched seam is created by turning a raw fabric edge inward and securing the folded edge with stitching.
This method encloses the raw edge and can produce a clean finish on the inside or outside of a garment, depending on the construction.
It can be useful for certain garment edges, lightweight hems, openings, and other areas where an enclosed edge is preferred.
The quality of this finish depends on accurate folding, pressing, and consistent stitching.
How to Sew an Edge Stitch
Creating a neat edge stitch does not require a complicated process, but accuracy is important.
Step 1: Prepare the Fabric
Complete the required seam or fold and press the fabric. A properly prepared surface makes it easier to maintain a straight stitching line.
Step 2: Choose the Needle and Thread
Select a needle and thread appropriate for the fabric. If the stitching will be visible, choose the thread colour according to the desired design.
Step 3: Decide the Stitching Distance
Determine how close the stitching should be to the edge. The correct distance depends on the garment design and the purpose of the stitching.
Step 4: Position the Fabric
Place the fabric under the presser foot and align its edge with the appropriate machine guide.
Step 5: Start Sewing
Begin stitching at a controlled speed. Guide the fabric naturally rather than pulling or pushing it.
Step 6: Maintain Consistency
Keep the edge at a consistent distance from the needle throughout the seam. Using a seam guide can be particularly helpful for beginners.
Step 7: Handle Corners Carefully
Slow down when approaching corners and curves. Plan the turn before reaching the corner to avoid uneven or wobbly stitching.
Step 8: Finish and Press
Secure the stitching appropriately and press the completed area if required. Pressing can help the finished edge sit flatter and look cleaner.
Where Is Edge Stitch Used?
The technique can be found in many different garment-construction applications.
Common examples include:
- Shirt collars — to define and secure the collar edge
- Cuffs — for a neat finished appearance
- Pocket edges — to secure and visually define the pocket
- Plackets — to reinforce and finish garment openings
- Necklines — where a visible edge finish is required
- Waistbands — to secure the waistband construction
- Seams — to keep certain seam allowances flat
- Hems — for selected garment finishing methods
- Jackets and coats — to highlight seams and construction lines
- Bags and accessories — to provide both structure and decorative detail
The exact application depends on the fabric, garment design, and construction method.
Tips for a Neat Edge Stitch
Even stitching is the most important part of achieving a professional result. Keep these tips in mind:
Use a Consistent Seam Guide
A machine’s seam guide can help maintain an even distance from the edge. Avoid relying entirely on visual estimation while learning.
Press Before Stitching
Wrinkled or uneven fabric can make it difficult to produce a straight line. Pressing the fabric first can make the process much easier.
Practise on Scrap Fabric
Before stitching the actual garment, test your thread, needle, stitch length, and machine settings on a fabric scrap.
Avoid Pulling the Fabric
Let the machine feed the fabric naturally. Pulling it can distort the fabric and cause the stitching line to become uneven.
Slow Down Around Curves
Straight edges are generally easier to control. Curves and corners require more attention, so reduce your sewing speed when necessary.
Choose the Thread Carefully
Matching thread creates a subtle finish, while contrasting thread makes every detail more noticeable. Choose according to the garment’s design.
Edge Stitch vs Reinforcement Stitch
Although the two techniques can sometimes appear together, their main purposes are different.
Feature | Edge Stitch | Reinforcement Stitch |
Main purpose | Finish, secure, or define an edge | Strengthen a stress point |
Typical placement | Close to a fabric edge | At areas exposed to stress |
Main focus | Neatness, stability, and appearance | Strength and durability |
Common examples | Collars, cuffs, pockets, seams | Pocket corners, seam ends, openings |
A garment may use both techniques in the same area when it needs both a clean finish and additional strength.
Final Thoughts
An edge stitch is a simple but valuable technique in garment construction. When sewn accurately, it can help secure edges, flatten seam allowances, improve finishing, and add subtle visual detail to a garment.
Understanding related techniques such as a reinforcement stitch, edge neatening seam, and edge turned and stitched seam also helps you choose the right construction method for different fabric edges and garment details.
With regular practice, maintaining a straight and consistent edge stitch becomes much easier—and that small improvement can make a noticeable difference to the professional finish of your sewing projects.
Join Disha Fashion Institute
You can also visit our Homepage or explore our different Course pages to learn more about our programs. If you need any guidance related to courses like Basic Tailoring, Diploma in Tailoring, Fashion Designing, or other fashion-related courses, feel free to contact us. Our team will understand your requirements, skill level, and career goals to guide you toward the most suitable course that matches your learning needs. you can check our YouTube Channel we post our Institute and tutorial over there.