
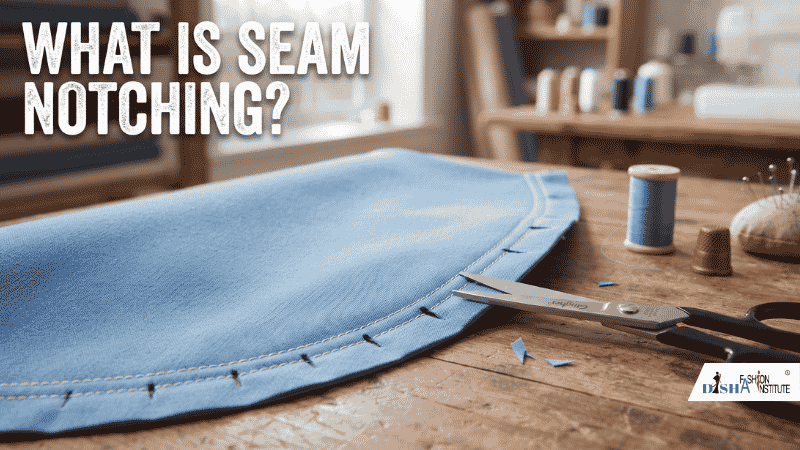
Seam notching is the process of removing small V-shaped pieces of fabric from the seam allowance of an outward curve. When a curved seam is turned, the outer edge of the seam allowance may need less fabric to fit smoothly. Notching removes the excess fabric and helps prevent bunching or overlapping.
This technique is commonly used for rounded collars, curved hems, and other outward-curved edges. The notches should stop safely before the stitching line to protect the seam.
Why Is Seam Notching Important?
Seam notching improves the appearance and finish of curved garment edges. Its main benefits include:
- Reduces bulk: Removes excess fabric from the seam allowance.
- Creates smooth curves: Helps rounded edges lie flat after turning.
- Improves garment finishing: Reduces bunching and overlapping around curves.
- Supports professional results: Makes collars, facings, and curved details look cleaner.
Without notching, excess fabric may gather inside the seam and create an uneven finish.
How Does Seam Notching Work?
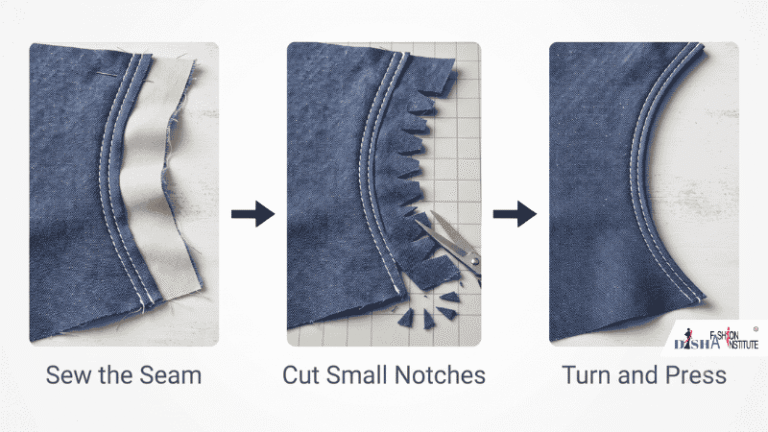
Follow these simple steps to notch a curved seam correctly:
- Sew the seam: Stitch the fabric pieces together using the required seam allowance.
- Identify the outward curve: Find areas where the seam allowance may bunch when turned.
- Cut small notches: Use sharp fabric scissors to remove small V-shaped pieces from the seam allowance.
- Protect the stitches: Keep each notch a safe distance from the stitching line.
- Turn and press: Turn the fabric to the right side and press carefully to create a smooth curve.
For tighter curves, you may need more closely spaced notches. Make them small and evenly distributed, and avoid removing too much fabric.
Where Is Seam Notching Used?
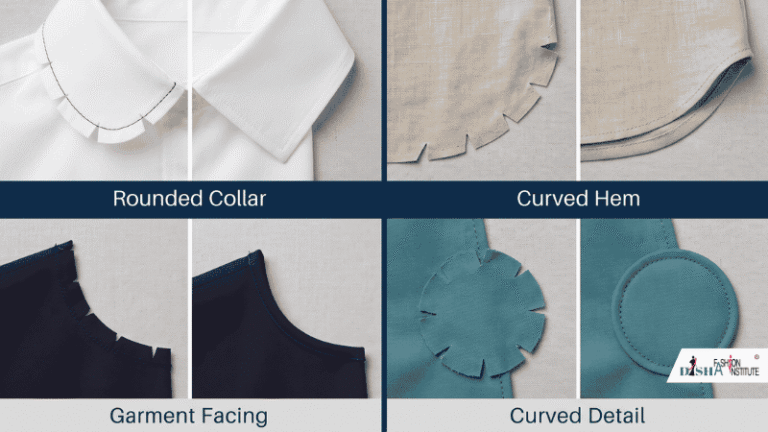
Seam notching is useful in several garment construction areas, including:
- Rounded collars: Helps curved collar edges turn smoothly.
- Curved hems: Reduces bulk around outward-curved sections.
- Garment facings: Helps curved facing edges sit neatly.
- Rounded design details: Improves the finish of curved decorative features.
- Outer curved seams: Helps manage excess fabric where the seam allowance would otherwise bunch.
The exact placement and spacing depend on the curve, fabric thickness, and seam allowance.
Seam Notching vs. Seam Clipping
Seam notching and seam clipping are related techniques, but they serve different purposes.
Seam notching removes small V-shaped pieces from the seam allowance of an outward curve to reduce excess fabric and bulk.
Seam clipping involves making small cuts into the seam allowance of an inward curve so the fabric can spread and the seam can lie flat.
Using the correct technique helps prevent puckering, pulling, and uneven curved edges.
Common Seam Notching Mistakes to Avoid
When learning seam notching, keep these points in mind:
- Do not cut through the stitching line.
- Avoid making notches too deep.
- Do not remove too much fabric from the seam allowance.
- Use sharp scissors for clean, controlled cuts.
- Always turn and press the seam to check the finished curve.
For delicate or loosely woven fabrics, work carefully because excessive cutting may weaken the seam allowance.
Final Thoughts
Seam notching is a simple but valuable sewing technique for reducing bulk around outward-curved edges. By removing small pieces of excess fabric from the seam allowance, you can create smoother collars, facings, and other curved garment details.
Whether you are learning basic tailoring or improving your garment construction skills, understanding seam notching will help you achieve neater and more professional sewing results.
Join Disha Fashion Institute
You can also visit our Homepage or explore our different Course pages to learn more about our programs. If you need any guidance related to courses like Basic Tailoring, Diploma in Tailoring, Fashion Designing, or other fashion-related courses, feel free to contact us. Our team will understand your requirements, skill level, and career goals to guide you toward the most suitable course that matches your learning needs. you can check our YouTube Channel we post our Institute and tutorial over there.